camgirl

10 quick revisions before editorial food photo shoot

The food photo shoot is tomorrow. Just to check, revise the following –

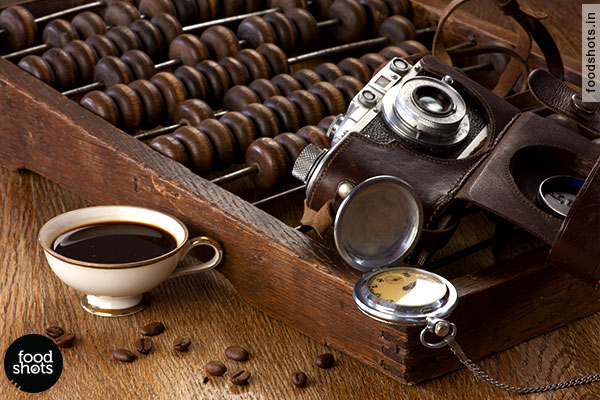
1. Pick a simple yet pleasing setting
The essence of setting is to enhance the visual of the food. But if the former is too grand or glittering, we doubt you will achieve the main purpose. Plates with basic and contrasting colors are the key.

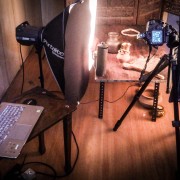
2. Maximum usage of natural light for natural looking subject
Although, it might not be feasible in all cases. But, do try to retain the charm of natural light wherever possible. For that, you may shift the set next to a large window. And a white curtain would be an added advantage as it ‘ll disperse the light.

Note: Avoid, using flash if there is a lack of natural light. It will only contribute to those unnecessary sparkling spots.

3. Harmonize the colors with a fine balance
One of the biggest drawbacks of not having natural light is those yellow or blue casts that make food look synthetic. If nothing then the white balance would come to this rescue. Adjust it for a flawless pic.

4. Be stable
When there’s a scarcity of light, dim atmosphere, and long exposures say in eateries would make the image blur even with the slightest movement. Making the use of a tripod is the best solution. If you are still to buy it, rest the camera on a water glass or the back of a chair.

5. Take as many pictures as possible
The more options the more choices and a greater probability to pick the best image. So, click all the angles you think could work wonders. And, choose the best.
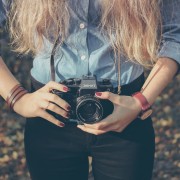
6. Magnify
Come closer to the subject, as much closer as possible. Make use of the macro setting if your camera features it. Let the entire frame be brimmed with food so that the while viewing, the feel of tasting it is evoked.

7. Arrangement
May you get more astounding pictures taken during the process of food preparation. So, capture every stage.

8: Rush!
Food spreads its freshness via images. Its condition says it all. Be active. Get things done faster. Otherwise Cold meat and de-moisturized vegetables can’t please anybody be it visually or tastewise.

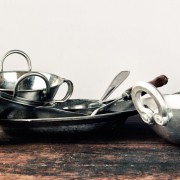
9. Microscopic features
A few details can wipe out all your efforts. Inspect the edges of the dishes and clean all the visible stains. Of course, little but notable efforts like usage of sauces and garnishing would also help in shadowing those undesirable details.

10. Shoot only when you feel it’s right
Just as you follow the instincts of experimenting with this angle or that angle; also follow the obvious instinct that certain dishes and angles can’t give appetizing pictures.
coffee | food photography Delhi India

Food Photography Now and Then

Ironically, there have been no or very few online sources enlightening us about the history of food photography. Yet, it has always been an integral part of advertising and branding. Let’s explore chronologically how the food photography as we know it evolved –

So what if there were no cameras, there were paintings!
So what if there were no lights, there were colors and paint brush!
Think about the era when there was no camera. Going back to the 16th and 17th century, skilled food painters were in high demand. They would meticulously draw food portrays. The choice of color would denote the level of lighting and mood. Some part of food would be shown spilling consciously. Such paintings with a touch of realism, several connotations and thoroughly thought composition continued till the beginning of 18th century. Then the trend of making even more realist paintings also dominated the several next decades.

Black and white yet so rich visually,
A touch of reality described attractively.
Don’t you cherish those colorless images – depicting the juncture between modernism and classicism. At the beginning of the 19th century, the food photography started to be shot by black and white camera. Now, when we will have a glimpse of those photographs, it’s effortless to feel the temperament of that period. In fact in 1867, the food photography also began to appear in cookbooks and the trend has been prevailing till now.

And, 20th century boomed with colors
We have colors now, thus, a wider scope of experimenting with the composition and lighting. By the virtue of advanced cameras of that time, colors into pictures came into being. In 1980’s, food was heavily decked up as if it is going to a party. The plates would be black. and the look would be absolutely elegant. While 1990’s witnessed a popular fashion of white containers with a white background. The food still looked classy but far more real as compared to that of the 1980’s.

21st Century welcomed the rough and rustic
Enough of the glitter and the glamour. Over the years, people had gathered a fair idea of distinguishing between a good food and only good-looking food. After 2000, the emphasis was much more on the health of the food. The setup was not elite-look centric but rather natural and practical. This change took place as the food customers were also looking for the ‘real’ feast.

Lighting tips for food photography

10 Lighting techniques for flawless food photography

1. Widen the light source –If the window that is sourcing the light is broad enough, it will do a wonderful job of the reducing the contrast level, sheltering the unnecessary texture details, and dwindling the shadows. Place the subject near the window where it doesn’t receive the sunlight instantly but diffusely. Food photography tips help you in evolving from amateur photographer to a professional one.
2. Bring the light source closer – Don’t get bewildered! There can be a certain position which provides indirect light yet located quite intimate to the light source. It’s effective to move the lamps closer to the subjects to highlight them better during the indoor shooting.

3. Dispersion makes the light spread and soft –
You should observe that in the winters, fog essentially becomes a medium to scatter the light into multiple directions. The brightness is soft and subtle. Since every day can’t be foggy, you are advised to use a translucent or white cloth to moderate the lighting effect.

4. Use the bouncing light –
If the region that sources light is narrow, then the ray shall bounce and get diffused further. In fact, the shiny reflector, a mirror (for example) will effortlessly bounce the focused light. Although the ray will be restricted in terms of area. To make an adequate reflector, wrap the crumpled aluminium foil around a cardboard.

5. Light gets dimmer with the increasing distance between subject and light source –
More is the gap between the light source and subject, the dimmer is the light. The law says the hero becomes square times lighter when moved away from the light source. During outdoor shooting, the camera’s flash can make the light on subject’s face comparatively less flashy without disturbing the background exposure.

6. Use light drop off to define subject and background –
The subject and the background have different visual importance. The former holds more attention so it deserves to appear brighter as well. Place the subject decently near the window that lights it from the front so that the background appears relatively darker.

7. The lighting direction decides the texture details –
If the light is positioned in front of the hero, the texture won’t reveal the unnecessary surface features. But, the case is opposite if the light is drawn from sideways or above. So, keep the light source in front when the texture isn’t that desirable. Such food photography tips alter the level of visuals from ordinary to extraordinary.

8. Shadows sets up volume –
The Three-D effect can be brought up by supplying the light from left, right, below or above – any suitable angle that casts significant shadows to make the image livelier and more reality-like.

9. Include a light source for the spark in the backdrop –
If you are lucky, the inclusion of the light source in the background might give a glittering backdrop. While the bright sunlight shall fall upon the subject – stressing less on the surface details.

10. The light itself has numerous color tones –
The sunlight in the day and evening would impart two different effects to the picture. As for a landscape, a clear bright noon will not yield the premeditated results. Therefore, set the camera’s color balance to cloudy. Or else, the landscape would appear needlessly blue during the bright daylight.
We hope these ten lighting techniques for flawless food photography prove to be of great help to you.
Herbs. Food Stylin and Food Photography Delhi India

How to preserve green’s green

For food photography garnishing is very important, it grabs the viewer’s attention and draws them towards the image. While in the cold times of the year, the preservation of the herbs is not a big deal. But, during the hot season it becomes a challenge.
The best way to get fresh herbs is to collect them from the growing plant, but what if it’s impossible? One of the wonderful ways to keep herbs fresh is to store them in the wet cheesecloth towel.
Here is the method
1. Wash the herbs carefully and remove all the spoiled parts
2. If roots are available, just wash them; avoid removing
3. Put clean cheesecloth towel in cold water, then squeeze it to remove the excessive water and wrap around the washed herbs
4. Put the wrapped herbs in the plastic bag or container and close it tightly
5. Keep the herbs in vegetable section of the fridge for about an hour before the photo shoot starts
Note:
1. While using the herbs for every shot,  wrap the remaining herbs again and put them back in the fridge as soon as it possible
2. Do not extravagantly wet the towel, extreme water may spoil the herbs
By the way, this method always works well if you love to add fresh herbs to your food. Enjoy!
How to keep the props clean. Food Photography in Delhi India by Foodshots.in

How to keep the props clean

Are you sure, as  a client, the props that you brought will work well for the photography?

Well, a prop might prove itself to be purposive enough. And, that compels an artist to reuse it during the same shoot. Your eyes are not magnifying glasses that they can observe all the towel or fingerprint marks. So, you need to dry the items. Otherwise, such distortions are so visible, that the picture has to be captured again.

All in all, the client needs to acknowledge what they are responsible for – from the clean look of the props to get rid of grabbing the ‘forbidden’ things from the set.

Rather than taking it as a burden, better read the following recommendations on how to keep the props clean.

Advice #1  Replace the regular towel with the one that has reusable microfibers. This amazing fabric doesn’t leave the particles on props and dry them much faster.
Advice #2 Use disposable gloves, especially if you work with metal props. In fact before the shoot, shiny metal  surfaces have to be cleaned with whitening powder for stainless steel.
Advice #3 As for the props rarely used for actual eating, you may like to use window cleaner such as “Mr. Muscle” to remove those undesirable fat spots.
Advice #4 If oily marks on the metal utensils are too old. Take refuge in using ammonia (try not to breath in while you clean, and close the bottle tightly). You can also boil small utensils such as forks, knives, small metal glasses and bowls in a big casserole in a mixture of ammonia, soda, vinegar and dishwasher (1 teaspoon of each on 3 liters of water).
Note :- This mixture can create a very strong reaction so add vinegar in the end and leave enough space in the casserole for some extra foam. Do not use this method for glass wares. If you like to keep your silver look like vintage one, then do not use this compound as it will make your silver look new and shiny again.
Advice #5 Before storing your props, wash them and wrap in paper, or place them in the textile bag. Doing this will actually save the life of your props, reduce contact with air and dust and save your time before shooting.
P. S. If you are going to use your props for real dinner after the session, make sure you wash them with hot water and everyday dishwasher. It will remove the remaining chemicals. Or better let props be props!