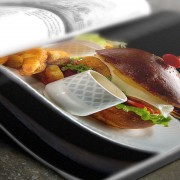
10 Lighting techniques for flawless food photography
1. Widen the light source –If the window that is sourcing the light is broad enough, it will do a wonderful job of the reducing the contrast level, sheltering the unnecessary texture details, and dwindling the shadows. Place the subject near the window where it doesn’t receive the sunlight instantly but diffusely. Food photography tips help you in evolving from amateur photographer to a professional one.
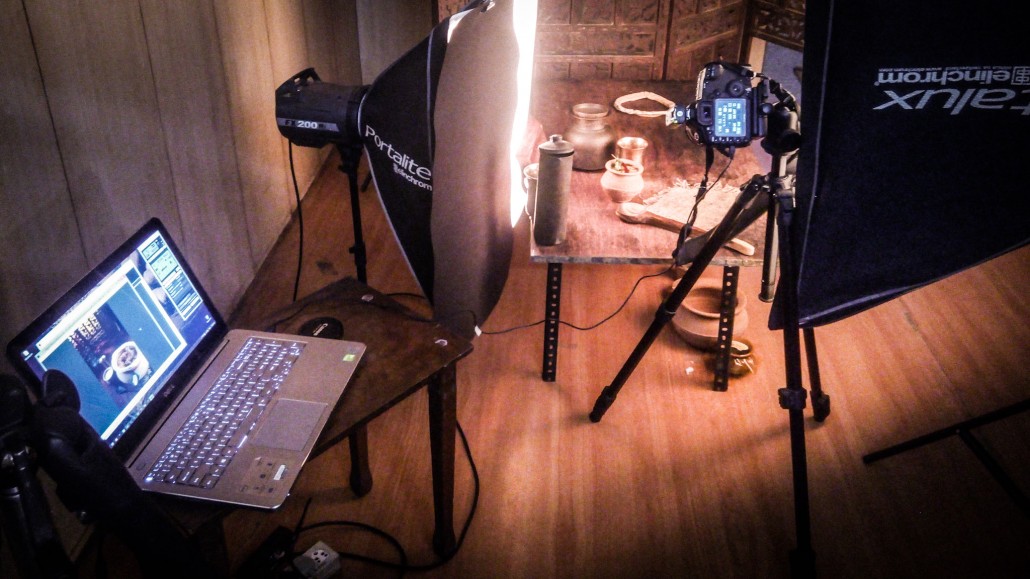
2. Bring the light source closer – Don’t get bewildered! There can be a certain position which provides indirect light yet located quite intimate to the light source. It’s effective to move the lamps closer to the subjects to highlight them better during the indoor shooting.
3. Dispersion makes the light spread and soft – You should observe that in the winters, fog essentially becomes a medium to scatter the light into multiple directions. The brightness is soft and subtle. Since every day can’t be foggy, you are advised to use a translucent or white cloth to moderate the lighting effect.
4. Use the bouncing light –If the region that sources light is narrow, then the ray shall bounce and get diffused further. In fact, the shiny reflector, a mirror (for example) will effortlessly bounce the focused light. Although the ray will be restricted in terms of area. To make an adequate reflector, wrap the crumpled aluminium foil around a cardboard.
5. Light gets dimmer with the increasing distance between subject and light source – More is the gap between the light source and subject, the dimmer is the light. The law says the hero becomes square times lighter when moved away from the light source. During outdoor shooting, the camera’s flash can make the light on subject’s face comparatively less flashy without disturbing the background exposure.
6. Use light drop off to define subject and background –The subject and the background have different visual importance. The former holds more attention so it deserves to appear brighter as well. Place the subject decently near the window that lights it from the front so that the background appears relatively darker.
7. The lighting direction decides the texture details – If the light is positioned in front of the hero, the texture won’t reveal the unnecessary surface features. But, the case is opposite if the light is drawn from sideways or above. So, keep the light source in front when the texture isn’t that desirable. Such food photography tips alter the level of visuals from ordinary to extraordinary.
8. Shadows sets up volume –The Three-D effect can be brought up by supplying the light from left, right, below or above – any suitable angle that casts significant shadows to make the image livelier and more reality-like.
9. Include a light source for the spark in the backdrop – If you are lucky, the inclusion of the light source in the background might give a glittering backdrop. While the bright sunlight shall fall upon the subject – stressing less on the surface details.
10. The light itself has numerous color tones –The sunlight in the day and evening would impart two different effects to the picture. As for a landscape, a clear bright noon will not yield the premeditated results. Therefore, set the camera’s color balance to cloudy. Or else, the landscape would appear needlessly blue during the bright daylight.
We hope these ten lighting techniques for flawless food photography prove to be of great help to you.